Showing posts with label Sally Hansen. Show all posts

Monday, November 12, 2012

Black and Gold Tribal

I used some more of my stamping plates here, and I did actually have a hard time finding a polish that would show up on top of black, so I just stuck with my gold polish. And even that didn't really show up all that well before I put on a matte top coat, the gloss from the Seche Vite really hid the details of the design. (As you can see in the first picture)

The first picture is of my hand, because the image actually came out a little crooked. I did line it up straight but when I stamped it the stamp came down crooked onto my nail, but I actually like that lineup better than it being straight on. But I had already done my left hand.. And I didn't really feel like doing it over. 
I still need to work on placement and getting the stamp straight on my nails. 

Also, my nails are too short, so this whole stamp image didn't fit on my nails. I kind of wish that it was either smaller so it would fit, or my nails were longer.. Lol 

(Image Used)

Seche Vite Topcoat

Matte Topcoat

Matte Topcoat

Polished Used:
Wet n Wild Fast Dry - Ebony Hates Chris
Sally Hansen Xtreme Wear - Golden-I 
Hard Candy Matte Topcoat

Plate Used:
MASH 47

Wet n Wild I got from Walgreens for about $2, Sally Hansen I got from Walgreens as well for about $2.50 and the Hard Candy topcoat I got from Walmart for $4.00
And Seche Vite topcoat I got from Amazon.

Friday, November 9, 2012

Pink Tips and a New Kitty!

I did another french tip design using my Sally Hansen french manicure set, though I didn't use the polish that were included, only the tapes. The tapes are so easy to use and have the little bit of curve, I do highly recomend them! I believe I bought them around two dollars for 60? I don't remember, I bought them awhile ago. 
I also used fimo canes for the first time, I bought them pre-cut because that was all that was available at my local Sally Beauty Supply. I think I bought a wheel of them for about $3-4. Again, I bought them awhile ago, so I don't remember exactly. 
First time using rhinstones too! I bought a wheel of these too at Icing, when I bought the polishes. These where also buy one get one half off along with the polishes. They were $4.50. 


Polishes Used:
Sally Hansen Diamond Strength - Pretty Petunia (Base Color)
Avon - Retro Rose (Tip Color)

The Sally Hansen polish my mom got so I have no clue how mush it is.. I think she got it at the local farmers market, so it would have been cheaper than the drugstores. 
And the Avon polish my mom also got, but I think it's around $2-3. 


And my new kitty! 
I got her from the local shelter, so she is a bit older; she's about eight months old. 
She loves cuddling but hates my dogs. lol. 
There she is on my bed. Her name is Willow. 
And she already lost that collar, I have no clue where it is... 

Friday, November 2, 2012

Sally Hansen - All Fired Up

I bought this polish on sale, originally it is about $8, but I got it for $1.99! 
Walgreens was having a major sale on this partically brand of Sally Hansen, just the Complete Salon Manicure, all of them were $1.99. This was really the only color that I liked that was left, all the rest were really sheer or just not my taste. 

Sorry my polish is chipped, this manicure is a day old. 
I didn't have time to take pictures before I had to go about my day, my brother came over to visit! I don't get to see him very often and I just did my nails really quick before he came over, they weren't even dry before he came in the door! lol
But now, as you can see, this polish doesn't have a whole lot of lasting power since it didn't even last 24 hours. 

All Fired Up - I do love the color of this polish, a very simple orangish-red creme; however, I do have a few polishes like this already just in my small collection: Revlon Fearless and Wet n Wild Megalast Red Tape. So it is definitely not a unique color.  This needed 2 coats.


Wednesday, October 24, 2012

Product Review: Sally Hansen Grow Nails Now

I started using this product, Sally Hansen Grow Nails Now, about a month and a half ago and I have to say it is amazing!
I have tried many products in the past to try and beat the many problems with my nails, and this one has definitely been the best. 
My problems include: peeling, weakness, thin, and nails that won't grow because they break before they get too long. But this product has made a significant difference! I have noticed that the peeling has gone away on all of my fingers except for my right index finger and thumbs (probably because I still use those fingers as tools...) and my finger nails are getter a tad stronger and will actually grow now! Granted I will have one finger nail that will break at the edge and then I'll cut them all down to that length, but that it is a lot better than them all breaking down to the point of bleeding before they even have a chance to really stop bleeding in the first place. 

This product is designd to for the treatment of short, brittle, damaged, and problem nails. 
Now thinking about it, I don't really have brittle nails; but this product still helped me significantly. 


I am not affiliated with Sally Hansen, so I do not, in any way, have a bias towards this company. 
This is a purely objective point-of-view from a satisfied buyer. 

Monday, October 15, 2012

Sally Hansen Posh Plum and Designs

I've had this color for awhile and kept passing it up, but now that I've put it on I can't imagine why! 

Posh Plum - this is a gorgeous purple color that has a little bit of a duochrome to it. In some lights it does look a bit more pink than purple, but mostly it gives off that wonderful bright purple color. Fuschia! This is the name that I was trying to come up with, I think this name aplies to this color quite accurately. It does have a bit of a shimmer to it, but it is very fine. 2 coats got this opague and to the color in the bottle. 


I did do a design over this as well. I did something simple because I wanted the plum to still show through really well. 
I used Sally Hansen's Golden-l for the designs. 
This has got to be my all time favorite gold as well! I have used quite a few, Milani Signature Gold, Essie Good as Gold... Nothing compares! And for the price, it is amazing for detailing, designing, or a while nail!


I got these both from Walgreens: buy 2 for $5 or 1 for $2.99


Sunday, September 23, 2012

Navy and Gold

I did another french tip mani today, but with a little bit of a twist. I did do an accent nail, as I usually do, to spice things up a little bit. 
But I took a picture of my right hand, instead of my left this time, because it turned out better. 

Polishes used: 
For the navy - Milani Sail Away
For the gold - Sally Hansen Xtreme Wear Golden-I (or Golden-l)
I don't know if the last letter in the name of the Sally Hansen polish is an upper case I or a lower case L.... 
But anyway, the Milani went on great; it was a little thick, but it did only need one coat and dried super quick, so by the time I was done painting my nails and clean-up I was able to put the tapes down and start with the gold. There was no wait time there. 
The gold was a little bit trickier. It was thick as well, and wanted to goop up at the tips of my nails, especially on my ring finger, which is why I decided to take a picture of my right hand. My left hand; the ring finger looks pretty bad. When I put the top coat on, the polish wasn't nearly dry enough because it had gobbed on near the tips and when I put the top coat on, the polish bled a little into the stripes. But it a very vibrant gold, just a little tricky to work with and, as you can see I was able to get it to work for my right hand, once I knew how it was going to work; this had been my very first time using this polish. 


Milani - Approx. $3.27 (Wal-mart)
Sally Hansen - Buy 2 for $5 or 1 for $2.99 (Walgreens)

Teal Swatch and Flowers


I just bought a whole bunch more polishes, and wanted to show them off, unfortunately it is going to be a bit slow... My schedule has been so hectic lately and I am not much of a fan of putting on a polish just to swatch it then taking it off. I want to wear it for at least one day because I am buying them... 

But anyway. Today I am swatching Milani Mint Candy. I bought it at Walmart for about $3.50, but it is also sold at other retailers such as Walgreens, Target and CVS, just for a bit more money. Though actually I think it's cheaper at Target? I'm not sure, I don't shop there a lot. 

Mint Candy - This is a dusky turquoise/teal color, in some lights you can see the turquoise shimmer in it, but indoors or when there is minimal lighting it isn't as noticable. I still really love it though. As for it being called mint, I think it's a bit too dark for that.


You can see the shimmer a little bit here.

And here.

I also put flowers on this polish just because I'm a little tired of just doing swatches. 


Polishes Used: Milani Mint Candy, Pure Ice Taupe Drawer (for the Pink), Sally Hansen French White Tip.

Pure Ice - Approx. $1.97 (Wal-Mart)
Sally Hansen French Tip - Approx. $5.00 (for the kit, Wal-mart)

Tuesday, September 18, 2012

Pink and Grey Tips

Something a little different, I don't usually go for really light colors, or when I do I offset it by a darker color somewhere.So I figured why not! What do I have to lose? If I don't like it, I can just take it off. 
I used Sally Hansen Wet Cement and OPI Hawaiin Orchid to make this design. 


And let me just say, I've had the OPI for a few years now and I've never used it... I don't really know why but with my experiences today I cannot blame myself. It was very watery and took about six coats to fully cover the grey. I don't know if it was like that when I bought it, I can't remember, but it is a very pretty color in the bottle. But so impossible do deal with. 

Any tips to thicken a nail polish?

OPI - I believe that this one was about $6-7, but as it has been so long that I've bought it I really don't remember. I bought it from a local beauty salon. 
Sally Hansen Xtreme  was Buy 2 for $5 or 1 for $2.99. 

Friday, September 14, 2012

Stained Nails

So I got stained nails a few polishes ago, when I had on the Avon polish because I didn't have a base coat. 
So my nails have been pretty ugly for about a week or two now and I've just been covering it up with more polish. Until now! 

I'll show you what I did step-by-step and what I used to get rid of my stained nails, for the most part.
And before and after pictures, so you can compare how they looked. 

(Left Hand)

(Right Hand)

So now on to what I used to get rid of this horrible green staining. 


This photo shows non-acetone nail polish remover, a small cup to put it in, a scrub brush,  a buffer/shine, cuticle oil, cuticle pusher, cutcle cutter, nail streghtener base coat, and hand cream; while not all of these things lead to removing stained nails, I thought I should add them in because it is part of the routine. 

First, I poured the a small amount of the non-acetone in the cup, which was only big enough to hold one hand at a time, and then soaked my fingers from 3-5 minutes. After this, while my fingers were still a little wet with the acetone I scrubbed them with the brush. And repeat with the other hand. 

Second, I buffed my nails with the nail buffer; this is the part that actually showed the most results. And then using the other side of the buffer (the side that is actually shown in the picture and says Revlon Crazy Shine) start to polish the nails or shine them. This will actually make your nails so shiny that it will look like your nails almost have a clear coat on them. 

Now the staining on my nails is practically gone. 
(Left Hand)

(Right Hand)

These pictures are after I cut my nails, filed them down, and cut the cuticles. 

Saturday, September 8, 2012

Sponging for the first time

So I tried sponging today, and it didn't come out exactly how I wanted... 
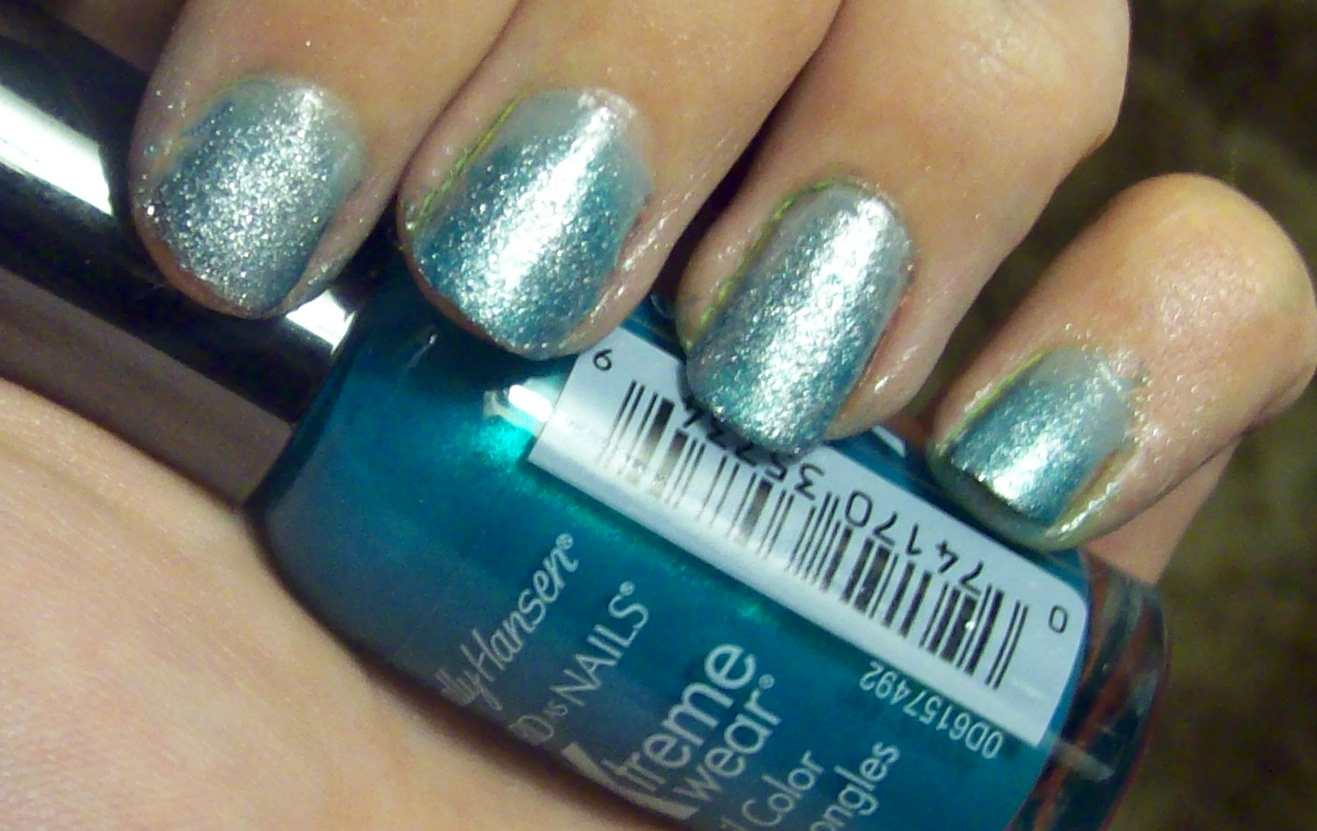
My base coat was Sally Hansen's Wet Cement, which is a light grey and I sponged a gradient of Sally Hansen's Celeb City, which is a silver. 
It didn't quite have the impact that I wanted because they were both so similar in color, so I added Sally Hansen's The Real Teal to give it a little bit more of a pop. So then basically now my nails are just a blue-ish silver..
I really need to work on sponging because I am no where near that good. The colors basically took over my whole nail and you can't even tell it's supposed to be a graient anymore.


Tutorial I used:

I bought the Sally Hansen Xtreme Wear for Buy 2 for $5 or 1 for $2.99, so these were on sale when I bought them from Walgreens. I did buy them in a bundle for the cheaper price, so that they were only $2.50 each.

Friday, August 24, 2012

New Polishes and Tools

I bought new polishes today and yesterday and I just wanted to show them off a bit. I also bought some dotting tools and striping tape. I will update when I actually get them on my fingers, and what they look like on, but as of right now I only have the names and the bottles. I did buy some online too so I don't actually have those in my posession. 

But the polishes that I got from the store yesterday were Milani Yellow Whiz, Sally Hansen XTreme Wear Sun Kissed, China Glaze Fairy Dust, Beauty Secrets Top Coat, ORLY Nail Defense Base Coat, and this last one doesn't have a name on it but it's brand name is Sally Girl and it's a chunky gold glitter. 


The ones that I bought online are China Glaze Luxe and Lush, China Glaze Fast Track, and China Glaze Electrify all from the Hunger Games Collection. 

Milani - Approx. $4 (Walgreens)
Sally Hansen - Approx. $3 (Walgreens)
China Glaze Fairy Dust - Approx. $5 (on sale, Sally Beauty)
China Glaze (The Rest) - Approx. $4.50 each (Amazon)


Wednesday, August 22, 2012

Cross Design with Milani and Sally Hansen

Sorry the picture is so horrible... I don't have a very good camera. 
I made this design just a bit ago, but go easy on me I've never done this one before and I've actually only done french style tips twice before. But this is done with Sally Hansen's Black Platinum and Milani's Signature Gold. The picture does not give them credit as the black looks more blue in the first one... I did try editing them a little, but Photoshop only works so much. The polish did bubble up a little bit, I don't know why. If any one has a solution to this I would love to hear from you! I have not been able to fix this problem.
At first I thought it might be my base coat I was using, but I didn't use it on my left hand, as I chnged polish at the last minute from a flat color to this one that has a bit of shimmer. And the bubbling also happens before I put on my top coat. But anyway! I hope you like this design! I will be posting more once this one starts chipping, I've never used this gold before either so I don't know how long it generally lasts, but the black usually lasts 3-4 days and nail polish doesn't tend to last long on my nails. 
Where I got the idea: (And most of my ideas)

Milani - $4.00 (Walgreens)
Sally Hansen - Approx. $6 (Wal-Mart)